Showing posts with label paper mache. Show all posts

Monday, February 28, 2011

Paper mache figure on a bottle

You need:

  1. wine bottle
  2. newspapers torn in strips
  3. paper tape
  4. wallpaper paste
  5. tempera paint
  6. brushes
  7. varnish
  8. fabrics
  9. wool, cotton, feathers etc.

Students make a ball of newspaper and tape it on the bottle with paper tape. Tear newspapers in strips and paste them with wallpaper paste on the ball far over the bottle so that the tape is not visible anymore. Be sure to use a lot of wallpaper paste.
If the ball on the bottle is smooth, students make eyes, nose, ears and paste them on the head. Fix them with paper strips and paste. Let dry for at least 24 hours.

After drying the figures can be painted. Start with the brightest colour. Paint several times to be sure the ink of the newspaper is not visible anymore. Varnish the dolls to make them shine.

After drying the doll has to be dressed and beautified. Use fabrics, wool, cotton, feathers, beads, lace etc. Paste them on the bottle and head with strong glue.

All artworks are made by students of grade 3

Thanks to Ruth Megens

Friday, July 23, 2010

Totem poles


You need:

  1. large paper tube
  2. egg cartons
  3. toilet rolls
  4. masking tape or duct tape
  5. wallpaper paste
  6. scissors
  7. cardboard
  8. newspapers
  9. tempera paint
  10. brushes
  11. varnish spray

Totem poles are an important art form for the Pacific Coast people. They are made from the trunks of red cedar trees and often depict people, animals, birds and fish. These characters are frequently arranged to be used to explain a story.

Divide the class in groups of four students. Give each group a large paper tube (aks a poster shop), a jar with wallpaper paste, cardboard, masking tape, egg cartons, toilet rolls and a lot of newspapers.

First decide how many characters you will make on your totem pole. Use cardboard to make appendages such as wings. These are first drawn out with a marker and then cut out. The appendages are then taped onto the tube. Use egg cartons or toilet rolls to make eyes or a mouth. Cover the armature of your totem pole completely with strips of newspapers.

Let the totem pole dry, this may take some days. The totem pole is then painted with tempera paint in bright colours. Finally spray the totem pole with varnish, to be sure the colours will shine.

Totem poles, made by students of 10-11 years old

Monday, February 1, 2010

Carnival portraits


You need:

  1. a shelf
  2. balloon
  3. newspaper strips
  4. wallpaper paste
  5. toilet rolls, bottle caps, polystyrene etc.
  6. toilet paper or paper towels
  7. acrylic paint or tempera paint
  8. brushes
  9. glitter
  10. confetti
  11. black marker

Blow the balloon. Paste newspaper strips on the half of the ballon. Be sure you have at least eight layers. Let the work dry.

Take the balloon uit. Cut the edges and lay this half balloon on the shelf. Use costless things like toilet rolls, bottle caps or polystyrene to shape the face. Fix these parts with newspaper strips and wallpaper paste. The last layer has to be toilet paper or paper towel. Let the work dry again.
Paint the portrait with acrylic paint or undiluted tempera. Give the face a body. Sprinkle glitter or confetti in the wet paint.

This lesson and photographs were sent to me by Ghislaine Aarts.

Saturday, January 30, 2010

Birdhouse of paper mache

I've got this great paper mache lesson from Ghislaine Aarts.

You need:

  1. box from boots
  2. scissors
  3. masking tape
  4. saw
  5. 2 wooden paint stirrers (DIY store)
  6. wallpaper paste
  7. newspaper strips
  8. toilet paper or paper towels
  9. brushes
  10. acrylic paint or tempera paint
  11. brushes
  12. varnish
  13. artificial snow
  14. small decoration items like pineapples, peanuts or berries
  15. glue gun
  16. wood for frame
Make a rectangle from the lid of the boots box by cutting the sides. Cut three rectangles from the box and glue them up with masking tape. See the photograph.

Saw one of the sirrers in two halves. Lay the halves of the stirrers and the complete one on the board. Lay the cardboard roof above. See photograph 2.

Paste everything together with newspaper strips and wallpaper paste (paper mache). Your latest layer has to be toiletpaper or paper towel. Leave the work to dry.

Paint the bird house with acrylic paint or tempera. Paint one or more birds upon it. Let your work dry carefully and then finish it with colourless varnish. Scatter some artificial snow on the roof if you like it. You may glue some berries, pineappels or peanuts around the bird house for decoration. Frame your work.

Sunday, January 24, 2010

Colourful dog

You need:
  1. newspapers torn in strips
  2. wallpaper paste
  3. toilet paper or paper towels
  4. tempera paint
  5. brushes
  6. black marker
  7. varnish

There are many tutorials in the internet about paper mache. Search for 'how to make paper mache'.
In this lesson we made doggies from paper mache. After drying the dogs are painted with tempera in bright colours. Use a black marker to outline the patterns. Finish the dog with transparent varnish.


Made by students from 10-11 years old
Thanks to Anne Steenbergen en Malou.

Friday, May 22, 2009

Fruit


You need:

  1. wallpaper paste
  2. newspaper strips
  3. toilet paper or paper towels
  4. magazines
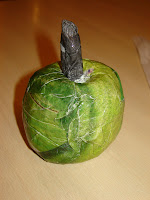
From paper mache you can make a nice fruit basket. Start with a wad of newspaper and paste newspaper strips around it . Use enough glue, so the work is so wet that you can make figures out of it. Make the last layer of toilet paper and make it smooth.

Tear small pieces of coloured paper from magazines in the color of your fruit and glue them around. Use different shades within one color.


After drying, the fruit can be laquered with vernish.