Showing posts with label sculpting. Show all posts

Wednesday, October 12, 2011

Three owls of clay

Artworks are made by students of grade 5
You need:
  1. clay

  2. two beer coasters stapled together

  3. clay plate

  4. clay knife

In this lesson students will sculpt three massive forms together and then decorate them.

View pictures of owls and talk about the basic shapes: an oval for the body, round eye shapes, conical beak and plumes (note, these are not ears, because they are on the side of the head).


Students make three egg shapes in different sizes. The pointed end is the bottom of the owl. Modell these shapes together. Work out the shapes by attaching wings, beaks, plumes, eyes etc. The wings are made from flattened clay balls. To attach the wings, roughen the bonding side and press the wing firmly on the body.
Do the same with beak and plume using a conical shape. Make eyes by pressing the finger in the head. Apply texture to the wings, the body and around the eyes using a clay knife or little sticks.

Place the work on two stapled beer coasters. Let it dry for a few weeks before baking.

Monday, June 27, 2011

Plaster mask

Made by a student of grade 6
You need:

  1. bandage plaster

  2. vaseline

  3. towel

  4. jar with water

  5. scissors

  6. canvas

  7. cloth tape

  8. tempera paint

  9. brush

  10. stuff to decorate, like feathers, stones, shells, ribbons

  11. glue

Work in groups of two students.
Show a You tube movie about making masks or read Wiki how manual. In brief students have to:

1. Put a towel around the shoulders and pull the hair off the face.


2. Coat the face well with vaseline, especially hair line, eyebrows and eyelashes.
 
3. Cut the bandage plaster in strips. Make the strips one by one wet and cover the face. Be sure the strips overlap a little. Leave the nose open.
4. Provide three layers plaster for a solid mask.


5. Remove the mask after 15 minutes.


6. Close the hole of the nose with a last plaster strip.
Outline the mask with a pencil on a canvas. Cut a hole in the canvas about 1 centimeter smaller than the mask. Push the mask through the hole from the back of the canvas and stick it to the front and back with cloth tape.
Paint the canvas and face with tempera. Decorate the artwork with feathers, ribbons, shells or strass stones.

Students of grade 6 with their masks

Monday, February 28, 2011

Paper mache figure on a bottle

You need:

  1. wine bottle
  2. newspapers torn in strips
  3. paper tape
  4. wallpaper paste
  5. tempera paint
  6. brushes
  7. varnish
  8. fabrics
  9. wool, cotton, feathers etc.

Students make a ball of newspaper and tape it on the bottle with paper tape. Tear newspapers in strips and paste them with wallpaper paste on the ball far over the bottle so that the tape is not visible anymore. Be sure to use a lot of wallpaper paste.
If the ball on the bottle is smooth, students make eyes, nose, ears and paste them on the head. Fix them with paper strips and paste. Let dry for at least 24 hours.

After drying the figures can be painted. Start with the brightest colour. Paint several times to be sure the ink of the newspaper is not visible anymore. Varnish the dolls to make them shine.

After drying the doll has to be dressed and beautified. Use fabrics, wool, cotton, feathers, beads, lace etc. Paste them on the bottle and head with strong glue.

All artworks are made by students of grade 3

Thanks to Ruth Megens

Friday, July 23, 2010

Totem poles


You need:

  1. large paper tube
  2. egg cartons
  3. toilet rolls
  4. masking tape or duct tape
  5. wallpaper paste
  6. scissors
  7. cardboard
  8. newspapers
  9. tempera paint
  10. brushes
  11. varnish spray

Totem poles are an important art form for the Pacific Coast people. They are made from the trunks of red cedar trees and often depict people, animals, birds and fish. These characters are frequently arranged to be used to explain a story.

Divide the class in groups of four students. Give each group a large paper tube (aks a poster shop), a jar with wallpaper paste, cardboard, masking tape, egg cartons, toilet rolls and a lot of newspapers.

First decide how many characters you will make on your totem pole. Use cardboard to make appendages such as wings. These are first drawn out with a marker and then cut out. The appendages are then taped onto the tube. Use egg cartons or toilet rolls to make eyes or a mouth. Cover the armature of your totem pole completely with strips of newspapers.

Let the totem pole dry, this may take some days. The totem pole is then painted with tempera paint in bright colours. Finally spray the totem pole with varnish, to be sure the colours will shine.

Totem poles, made by students of 10-11 years old

Sunday, January 24, 2010

Colourful dog

You need:
  1. newspapers torn in strips
  2. wallpaper paste
  3. toilet paper or paper towels
  4. tempera paint
  5. brushes
  6. black marker
  7. varnish

There are many tutorials in the internet about paper mache. Search for 'how to make paper mache'.
In this lesson we made doggies from paper mache. After drying the dogs are painted with tempera in bright colours. Use a black marker to outline the patterns. Finish the dog with transparent varnish.


Made by students from 10-11 years old
Thanks to Anne Steenbergen en Malou.

Saturday, October 31, 2009

Birthday cake

Birthday cake, made by Kindergartners

You need:
  1. salt dough
  2. brushes
  3. paint
  4. birthday candles

SALT DOUGH RECIPE:

  • 2 cups of plain flour
  • 1 cup of table salt
  • 1 cup of water
Mix table salt and flour in a large bowl. Gradually add 1/2 cup of water and mix to desired consistency. Knead the dough on a flat surface, adding a few more drops of water as needed (but not making it too moist). If possible it is best to let the dough stand for approximately twenty minutes before beginning a project. Unused dough can be stored in the fridge, in an airtight container or cling film, for up to a week.

Instead of allowing the dough shapes to air dry, you can bake them in the oven at 100 degrees C / 200 degrees F until hard. Baking times varies depending on oven and dough thickness. Make sure the dough is completely baked. You can cover the dough with aluminum foil if it starts to darken before completely baked through.

What does a birthday cake look like? What form do we get, when we cut a round cake into pieces? Each child makes his own piece of a birthday cake out of salt dough. Make a little hole on top of the cake before baking; this is for the candle.
After baking the top and backside of the cake pieces have to be painted. Put the candles in the pieces and lay all pieces together on a pie shell.

Friday, May 22, 2009

Fruit


You need:

  1. wallpaper paste
  2. newspaper strips
  3. toilet paper or paper towels
  4. magazines
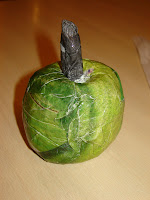
From paper mache you can make a nice fruit basket. Start with a wad of newspaper and paste newspaper strips around it . Use enough glue, so the work is so wet that you can make figures out of it. Make the last layer of toilet paper and make it smooth.

Tear small pieces of coloured paper from magazines in the color of your fruit and glue them around. Use different shades within one color.


After drying, the fruit can be laquered with vernish.

Wednesday, May 20, 2009

Blouse of clay

Blouses of clay by students of grade 6


You need:
  1. clay

  2. clay tools

  3. clay boards

Bring a blouse in the classroom and show kids how it has to be folded. Ask children to try it themselves. Look at the folded blouse and discuss what parts of the blouse are still to be seen (collar, buttons, pocket, the folds on the side) and the parts that are hidden now. Give each child a ball of clay. Their task is to make a folded blouse out of one piece of clay. Except the buttons no part may be sticked, everything has to be made out of one ball of clay. Be sure kids scretch their name in a label in the back of the collar. After the baking process, the blouses can be painted with tempera and lacked with vernish.